What Sets Hard Pen and Brush Calligraphy Apart
Pick up a ballpoint pen and write your name. The lines stay the same width no matter how hard you press. Now imagine a tool where the slightest change in finger pressure transforms a hairline stroke into a bold ribbon of ink. That single difference, consistent line versus variable line, is the core divide between hard pen and brush calligraphy. Understanding it shapes every decision you'll make about tools, practice time, and the styles you can realistically achieve.
What Hard Pen Calligraphy Actually Means
Hard pen calligraphy refers to any calligraphic practice performed with a rigid-tipped writing instrument. Fountain pens, ballpoint pens, dip pens, pencils, and felt-tip markers all qualify. The calligraphy definition here centers on deliberate, artful letterforms rather than casual handwriting, but the tool itself resists pressure variation. You control spacing, rhythm, and proportion while the pen delivers a near-uniform stroke width.
In Chinese tradition, this discipline is known as 硬笔书法 (yingbi shufa) and carries centuries of cultural weight. Practitioners study classical brush copybooks and translate those structures into the thinner, bone-like strokes a hard pen produces. The result strips away the fleshy thickness of brush strokes while preserving the skeletal architecture of each character. It is a major discipline with its own masters, competitions, and pedagogical methods, not simply a lesser version of brush work.
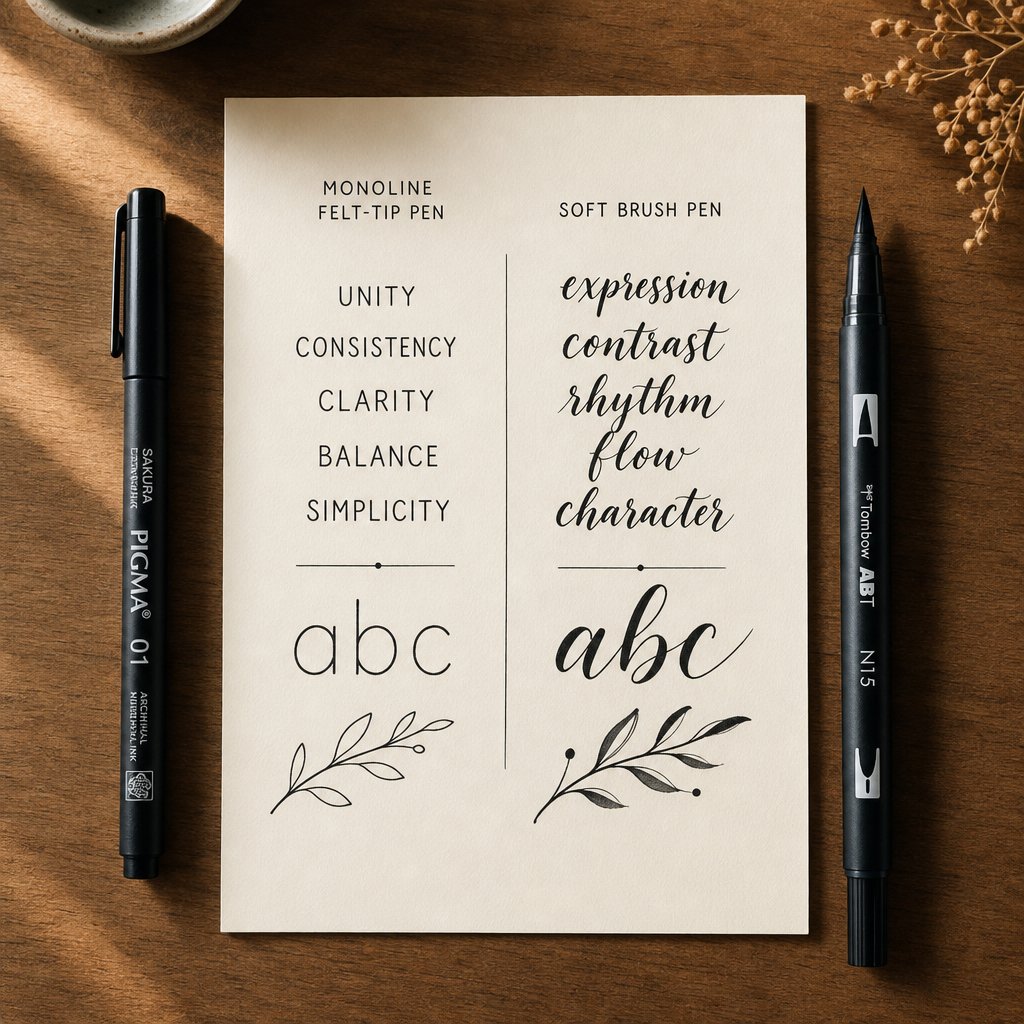
For Western calligraphers, hard pen lettering often means monoline styles, faux calligraphy techniques, or structured scripts where letterform accuracy matters more than stroke contrast. The tool forgives inconsistent pressure, letting beginners focus entirely on shape and spacing.
How Brush Calligraphy Differs in Mechanics
Brush calligraphy flips the relationship between hand and line. Whether you use a soft brush pen or a traditional pointed brush dipped in ink, the flexible tip responds to every shift in force. Press down and the tip splays wide, producing a thick downstroke. Lift gently and the tip narrows to a fine point, creating a delicate upstroke. This is what calligraphy meaning looks like in physical motion: the writer's intent made visible through pressure dynamics.
Hard pens require consistent, steady pressure to produce uniform strokes. Brush pens require deliberate pressure variation, heavy on downstrokes and light on upstrokes, to create the thick-thin contrast that defines brush calligraphy.
Controlling that variation is the central skill in brush work. As Pieces Calligraphy explains, a huge part of gaining control is knowing your pen and practicing varying amounts of pressure for extended periods. You learn to transition smoothly between heavy and light force, and that learning curve is steeper than anything a hard pen demands.
Why This Comparison Matters for Your Learning Path
So what is calligraphy going to look like for you personally? The answer depends on which mechanic, consistent pressure or variable pressure, aligns with your goals and available practice time. Hard pen calligraphy builds structural awareness fast. Brush calligraphy delivers expressive, professional-looking results once you master pressure control. Neither is objectively better; they serve different purposes and, as you'll see, they complement each other in a logical progression.
This article ranks the best tools in each category, from beginner-friendly felt tips to advanced traditional brushes, so you can match your skill level and intended use case to the right instrument. The ranking criteria come next.
How We Ranked These Calligraphy Tools
Every calligraphy pen promises beautiful results, but not every tool delivers at the same speed or for the same purpose. To cut through the noise, we evaluated calligraphy tools across both categories using a consistent framework that prioritizes real-world progress over marketing claims.
Evaluation Criteria for Hard Pen Tools
Hard pen instruments were judged on how quickly a beginner can produce consistent, recognizable letterforms. Because these calligraphy pens remove pressure variation from the equation, the key differentiators become tip precision, ink flow reliability, and how well the tool supports structured practice with calligraphy exercise sheets. We also weighed portability and everyday usability, since many learners want a tool that doubles for journaling or handwriting improvement outside dedicated practice sessions.
Evaluation Criteria for Brush Tools
Brush tools introduce pressure mechanics, so our criteria shift accordingly. Here, we measured how forgiving the tip is during early learning, how wide the thick-thin contrast range extends, and how long the tip maintains its shape under repeated use. Versatility across project types, from envelope addressing to signage, factored heavily because brush calligraphy often serves decorative, one-off applications rather than daily writing.
How We Measured Learning Curve and Progression
The biggest gap in most calligraphy comparisons is honest discussion of time investment. We ranked tools by how many hours of focused practice a typical beginner needs before producing work they feel confident sharing. Skill transferability also matters: does mastering one tool make the next one easier?
Here are the ranking factors in order of importance:
- Ease of learning — time from first session to consistent output
- Versatility — range of use cases a single tool covers
- Cost — total startup investment including paper and ink
- Quality of output — how polished results look at each skill stage
- Skill transferability — how well technique carries over to other calligraphy styles and tools
These five factors shaped every recommendation that follows. The first category up: felt-tip hard pens and why they consistently rank as the fastest on-ramp for complete beginners.
Felt-Tip Hard Pens for Building Letterform Foundations
Imagine sitting down to practice calligraphy letters for the first time. You have no muscle memory, no instinct for spacing, and no feel for how letterforms connect. Adding pressure control on top of all that? It's a recipe for frustration. This is exactly why felt-tip pens and monoline markers earn the top spot for beginners: they strip away one entire layer of complexity so you can focus on what actually matters first.
Why Felt-Tip Pens Rank First for Beginners
A monoline tool produces strokes of consistent thickness regardless of how you hold it or how much force you apply. That forgiveness lets you direct all your attention toward learning the calligraphy alphabet: letter shapes, stroke order, spacing, and slant consistency. You're training your hand to move with intention rather than speed, and the pen never punishes you for uneven pressure.
Any round-tipped writing instrument works here. Gel pens, felt-tip markers, ballpoints, even a simple pencil. The barrier to entry is essentially zero. You likely already own a tool that qualifies, which means you can start practicing a beginner calligraphy alphabet tonight without ordering anything online.
The Faux Calligraphy Technique Explained
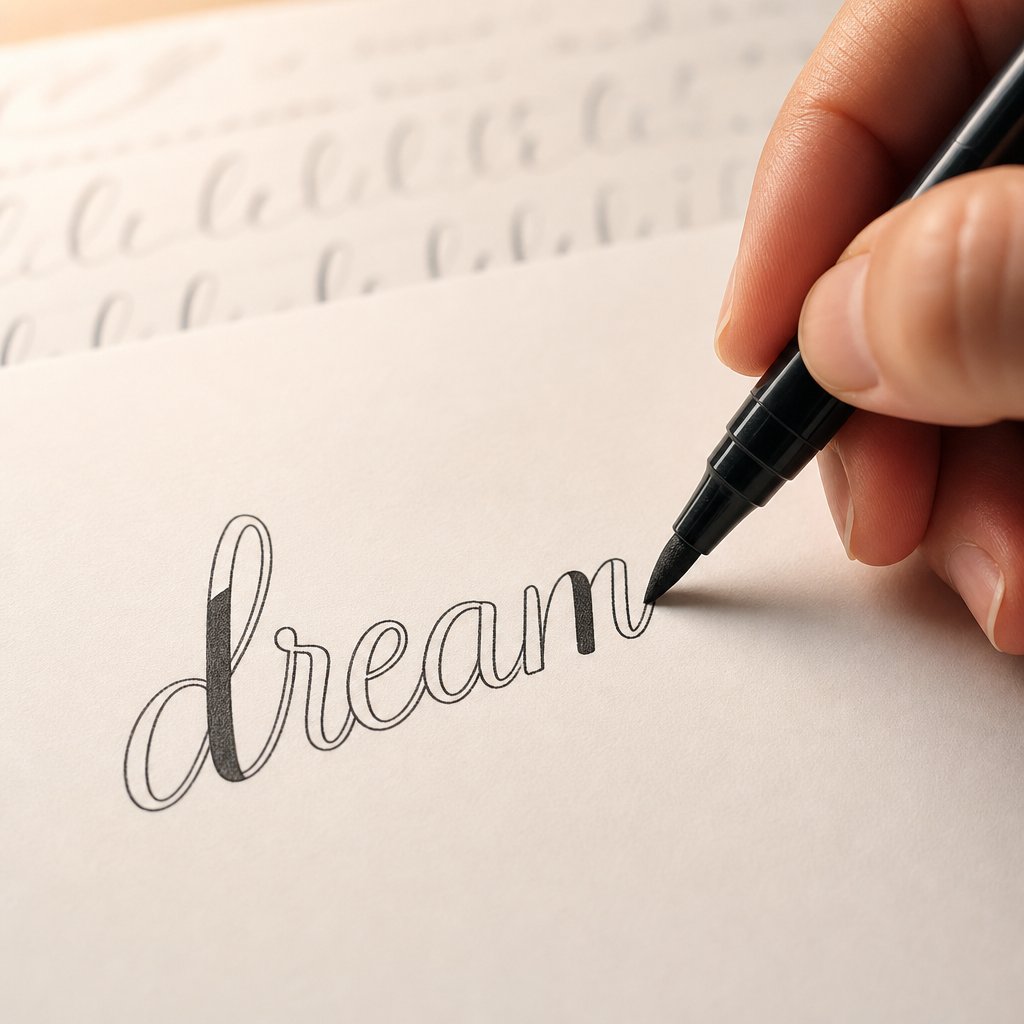
Here's where hard pen lettering gets genuinely creative. Faux calligraphy is a technique where you write calligraphy alphabet letters in cursive or a script style, then go back and manually add thickness to every downstroke. The process works in four steps:
- Write your word in cursive or a connected script using any monoline pen.
- Identify every downstroke, the moments where your pen moved downward on the page.
- Draw a parallel line alongside each downstroke to outline the area you'll thicken.
- Fill in that outlined space to create the thick-thin contrast that mimics brush calligraphy.
As Loveleigh Loops explains, knowing when and where to add shading to your letters is the key to turning ordinary handwriting into beautiful lettering that looks like calligraphy. The technique teaches you to see downstrokes and upstrokes as distinct elements, which is the exact same awareness you'll need when you eventually pick up a brush pen. The difference is that with faux calligraphy, you build that awareness slowly and deliberately rather than trying to execute it in real time.
This is also why monoline practice transfers so well to later styles. Memorizing the basic strokes and building muscle memory for upstrokes and downstrokes is the hardest part of lettering. Once you internalize where thick and thin belong in each letter, transitioning to a pressure-sensitive tool becomes a matter of mechanics rather than guesswork.
Best Use Cases for Hard Pen Lettering
Hard pen calligraphy isn't just a stepping stone. It has practical applications on its own: journaling, addressing envelopes with decorative faux calligraphy, creating chalkboard signs where brush tools can't reach, and improving everyday handwriting. Monoline scripts also scale beautifully for large-format projects like murals and posters, where brush pen tips simply aren't big enough.
Pros
- Extremely low cost, often free with tools you already own
- Forgiving of pressure inconsistency and grip mistakes
- Builds foundational letterform knowledge that transfers to every other style
- Works on any paper without bleeding or feathering concerns
Cons
- No natural thick-thin variation from the tool itself
- Faux calligraphy requires extra steps and time for decorative results
- Output can look less polished than brush work for formal projects like invitations
For learners who want that natural thick-thin contrast without the extra steps, the next category delivers it in real time through flexible brush tips that respond to every ounce of pressure your hand applies.
Soft Brush Pens for Natural Thick-Thin Contrast
Flexible brush tips do what faux calligraphy simulates, but they do it live, in a single pass. Press down and the tip fans out into a wide, saturated downstroke. Lift gently and it snaps back to a fine point, tracing a delicate upstroke. That real-time response is why soft brush pens dominate modern calligraphy and why they rank as the most popular tool for calligraphy lettering projects that need to look polished without post-production.
How Soft Brush Pens Create Natural Stroke Variation
A soft brush pen has a felt or nylon tip flexible enough to splay under pressure. The basic concept is simple: thin up, thick down. When you draw a stroke upward, you barely touch the paper, and the tip stays narrow. When you pull downward, you lean into the pen, and the tip bends to create a broader mark. As Archer and Olive explains, holding the pen at roughly 45 degrees and moving the whole hand rather than just the fingers makes controlling these thickness changes far easier.
This mechanic produces elegant contrast within each letter without any extra steps. You don't outline downstrokes after the fact or fill anything in. The variation happens as you write, which means a single word can go from start to finish in one fluid motion. That immediacy is what draws people to brush pen calligraphy over hard pen techniques for decorative work.
Ideal Projects for Soft Brush Pens
Soft brush pens shine brightest on projects where visual impact matters. Wedding invitation envelopes are a classic use case. As calligrapher Carla Schall notes, brush pens like the Tombow Fudenosuke or Pentel Sign Pen are beginner-friendly and forgiving, making them a solid choice for addressing envelopes yourself rather than hiring a professional.
Beyond weddings, think about seasonal projects. A hand-lettered happy birthday calligraphy card carries more warmth than anything printed. The same goes for merry christmas calligraphy on gift tags or holiday envelopes, where the thick-thin contrast of cursive calligraphy adds a personal, artisan quality that recipients notice immediately.
Journaling, place cards, signage, and social media content all benefit from the expressive range these pens offer. The wide color selection available from brands like Tombow, which offers over 100 shades with blendable water-based ink, means you can match any project palette without switching tool types.
Pros and Cons for Different Skill Levels
The tradeoff with soft brush pens is straightforward: they produce more beautiful results than hard pens, but they demand more from your hand. Pressure control is a muscle-memory skill that builds over weeks of daily practice, not hours. Loveleigh Loops recommends practicing basic strokes, upstrokes, downstrokes, underturns, and overturns, before attempting full letters, because rushing to words before mastering individual strokes leads to inconsistent results.
Pros
- Beautiful natural thick-thin variation in a single pass
- Wide color range and blending capabilities with water-based inks
- Versatile across project types from envelopes to signage
- No ink preparation or cleanup required
- Portable and ready to use immediately
Cons
- Steeper learning curve than hard pens, pressure control takes dedicated practice
- Tip wear over time, especially on textured paper
- Flexible tips can feel unpredictable for heavy-handed writers
- Requires smooth paper to protect the brush tip and prevent fraying
For learners who find soft brush tips too responsive, there's a middle ground: pens with firmer nylon tips that introduce pressure mechanics gradually without the full flexibility of a soft brush. That bridge category is where many calligraphers find their confidence before committing to either extreme.
Hard Nylon Tip Pens as the Perfect Transition Tool
You've built letterform awareness with a monoline pen. You understand where thick and thin belong. But picking up a soft brush pen still feels like jumping from a bicycle to a motorcycle. The tip bends too much, the strokes balloon unpredictably, and your carefully learned letter shapes fall apart under the pressure demands. This is exactly the gap that hard nylon tip pens fill. They introduce pressure response in a controlled, forgiving way that teaches brush mechanics without overwhelming your developing muscle memory.
Why Hard Nylon Tips Bridge Both Worlds
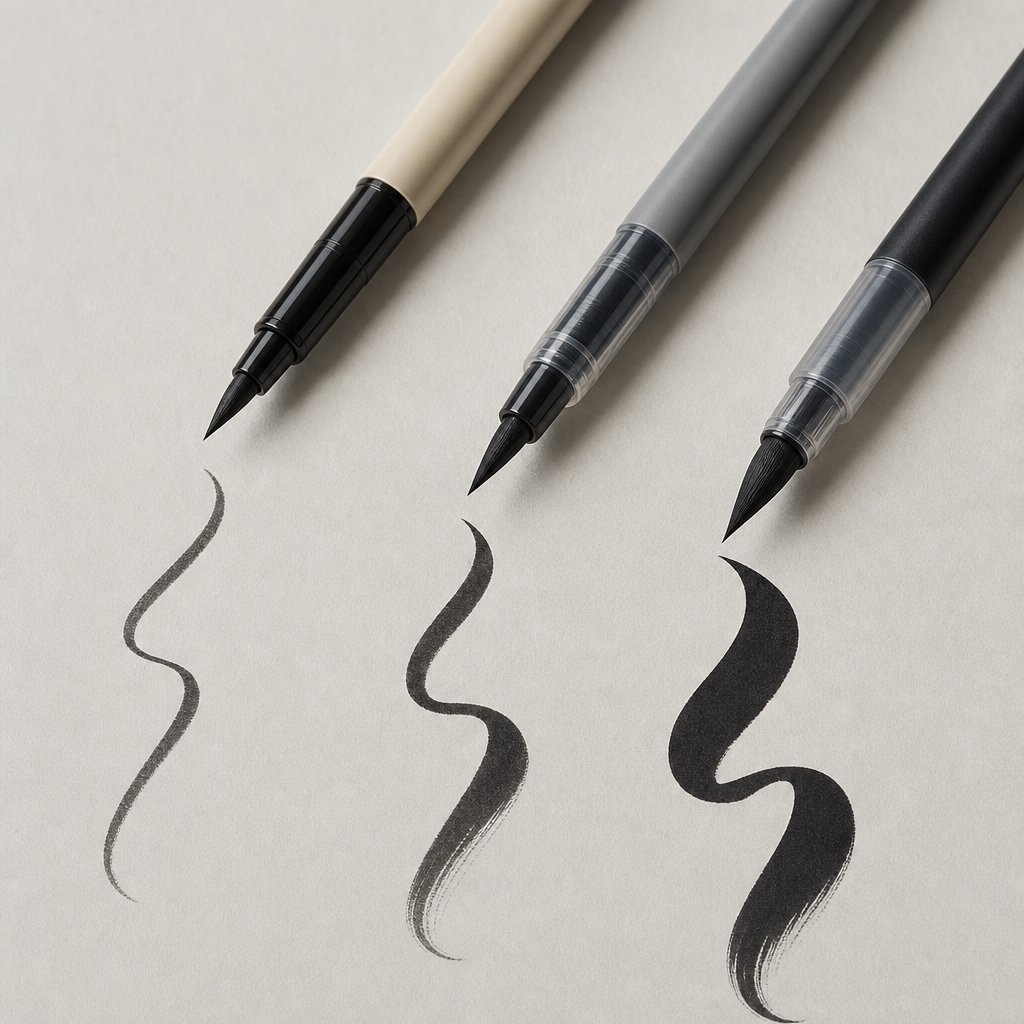
A hard nylon tip brush pen has a firm, resilient point that flexes slightly under pressure but resists splaying wide open. Think of it as a pen that whispers pressure variation rather than shouting it. You still get thick-thin contrast, just within a narrower range. The tip responds when you lean into a downstroke, but it won't collapse or fan out the way a soft brush does.
The Tombow Fudenosuke hard tip is the most widely recommended pen in this category. Its small, firm nylon tip produces clean lines with subtle variation, and as calligraphy educator Heidi Grace notes, hard tip brush pens are "still plenty flexible, but they feel firm instead of soft," making them far easier to control than their soft counterparts. The pen feels familiar, almost like a regular marker, yet it rewards deliberate pressure changes with visible stroke contrast.
This controlled response means you can focus on learning when to apply pressure rather than fighting to manage how much the tip deforms. It's a gentler on-ramp to the pressure-based mechanics that define brush calligraphy.
Transitioning from Hard Pen to Brush Technique
If you've been practicing faux calligraphy with a monoline pen, you already know which strokes should be thick and which should be thin. A firm brush tip lets you execute that knowledge in real time for the first time. The transition works because the pen's limited flex range keeps your mistakes small. An accidental heavy stroke on a soft brush pen might produce a blob; on a hard nylon tip, it produces a slightly thicker line that still looks intentional.
Calligraphy practice sheets designed for brush pen drills work especially well with firm tips. Basic stroke exercises like upstrokes, downstrokes, compound curves, and ovals teach your hand to modulate pressure gradually. Because the tip bounces back quickly and predictably, you develop consistent rhythm faster than you would with a floppy, soft brush that requires constant micro-adjustments.
Many calligraphers spend several weeks with a hard nylon tip before moving to softer pens. That intermediate period builds the pressure instincts you need without the frustration of fighting an overly responsive tool.
Best Styles to Practice with Firm Brush Tips
Hard nylon tips excel at structured, formal scripts where precision matters more than dramatic flair. Copperplate calligraphy, with its consistent slant and controlled swell strokes, translates well to a firm tip because the style demands measured pressure transitions rather than bold, sweeping contrasts. Practicing a copperplate calligraphy alphabet with a hard nylon pen teaches you to enter and exit each stroke with deliberate control, a skill that transfers directly to pointed pen work later.
Spencerian calligraphy is another natural fit. Its delicate hairlines and restrained shading rely on subtle pressure shifts, exactly the range a firm tip provides. The pen won't produce the dramatic thick-thin swings of a soft brush, but spencerian calligraphy doesn't ask for them. It asks for finesse, and a controlled nylon tip delivers that.
Pros
- Gentle learning curve for pressure control with limited flex range
- Durable tips that maintain shape through extended practice sessions
- Ideal for structured calligraphy practice sheets and drill work
- Feels familiar to anyone comfortable with regular pens or markers
- Produces clean, consistent results even during early learning
Cons
- Limited thick-thin range compared to soft brush pens
- Less expressive for decorative or large-scale projects
- May feel restrictive once pressure skills develop beyond the pen's flex capacity
Firm nylon tips teach you the language of pressure in a controlled dialect. But calligraphy's full expressive vocabulary, the sweeping strokes, dramatic contrasts, and centuries-deep traditions, lives in tools with far greater range: traditional pointed brushes that respond to the subtlest shift in your hand.
Traditional Pointed Brushes for Advanced Expression
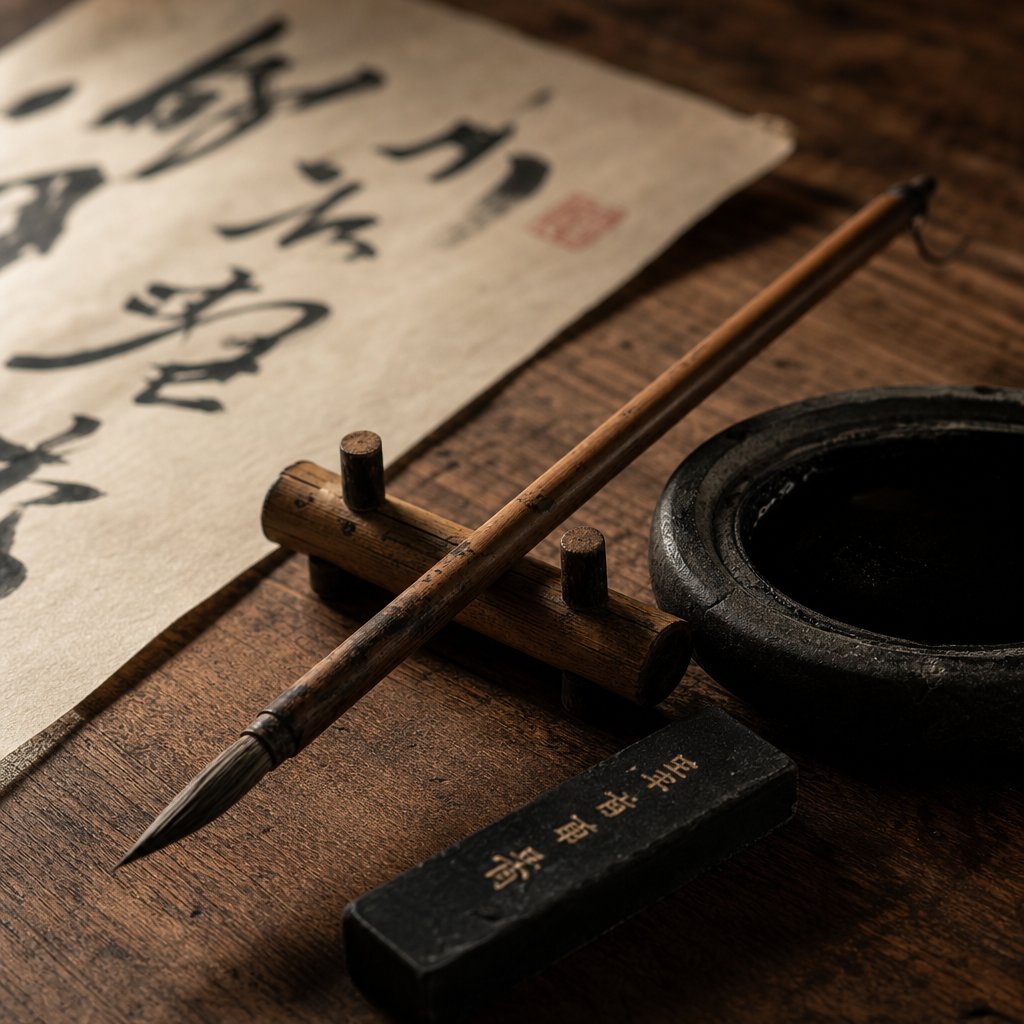
A brush pen is a modern convenience. A traditional pointed brush loaded with freshly ground ink is something else entirely. It responds not just to pressure but to speed, angle, moisture level, and the texture of the paper beneath it. Every micro-movement of your wrist registers in the stroke. That sensitivity is what makes traditional brushes the most expressive calligraphy tools available, and also the most demanding. If brush pens whisper and shout, a pointed brush can sing.
Traditional Pointed Brushes for Maximum Expression
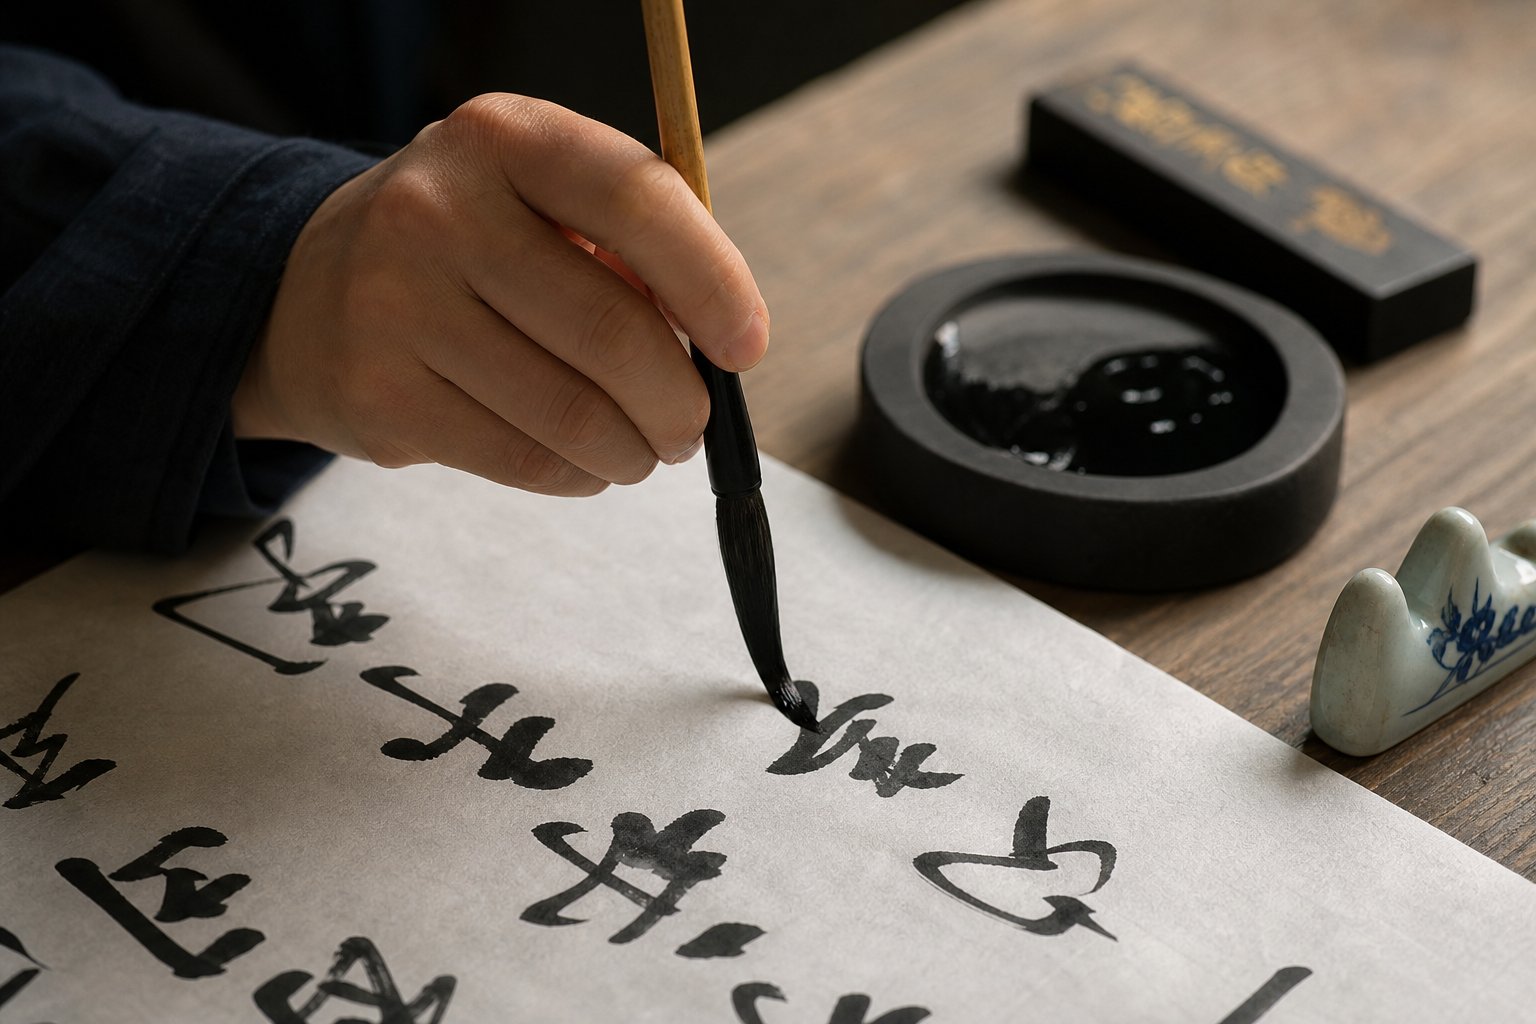
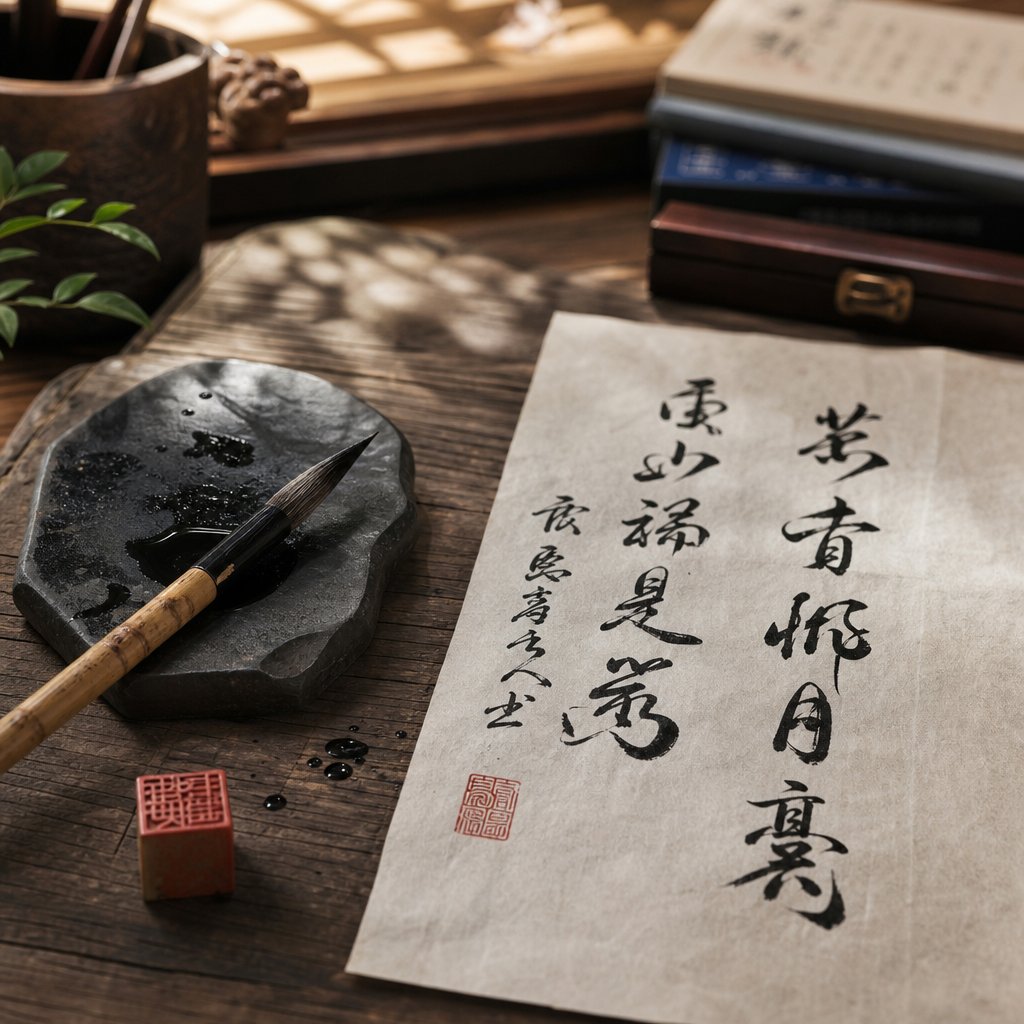
Traditional brushes used in calligraphy art come in two broad families. East Asian brushes, typically made from animal hair (wolf, goat, or mixed) set in bamboo handles, are designed to be held vertically and loaded with stick ink ground on a stone. Western pointed brushes, often synthetic or sable-hair rounds, are held at lower angles and used with bottled ink or watercolor. Water brushes, which store water in a squeezable barrel, offer a portable alternative for practice sessions away from the desk.
What unites these tools is their expressive range. A single traditional brush can produce strokes from hairline-thin to several centimeters wide depending on how much of the belly contacts the paper. No brush pen, no matter how soft, matches that dynamic range. You can shift from a whisper-light dot to a sweeping, saturated arc within a single character. That capacity is why serious calligraphers eventually gravitate toward traditional brushes, even after years of productive work with modern pens.
Chinese Calligraphy Brush Techniques and Their Western Parallels
Chinese calligraphy operates on principles that have no direct equivalent in Western brush pen practice. The most fundamental is the Center Tip Theory (中鋒, zhōng fēng), which requires keeping the brush tip centered within the stroke and the handle perpendicular to the paper. This produces strokes described as "full of strength and vigor" because the ink distributes evenly across the mark rather than pooling on one side.
A Chinese calligraphy brush demands vertical posture, suspended wrist, and whole-arm movement. Western brush pen calligraphy, by contrast, typically uses a 45-degree pen angle and relies heavily on finger and wrist motion. The difference isn't just ergonomic. It shapes the entire character of the output. Chinese calligraphy brush work produces strokes with internal structure, where the beginning, middle, and end of each mark carry distinct visual weight and intention.
Advanced practitioners blend the Center Tip technique with 側鋒 (cè fēng), a side-brush method that tilts the handle to create textured, expressive effects. As traditional theory holds, mastering the centered approach first makes side-brush work intuitive, but the reverse rarely works. This layered skill progression mirrors the hard-pen-to-brush-pen path discussed earlier, just at a higher level of refinement.
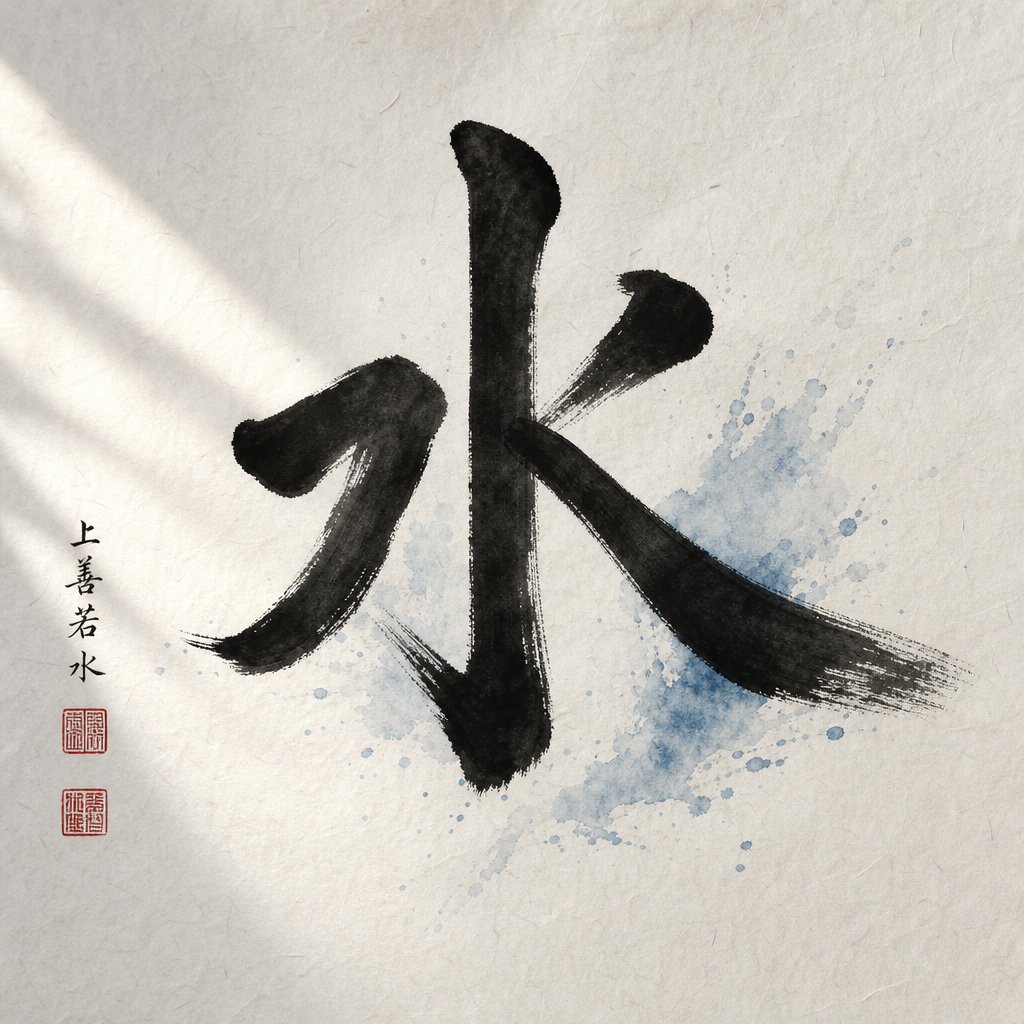
Japanese calligraphy, known as shodo calligraphy or "the way of writing," shares these foundational brush mechanics but emphasizes different aesthetic values. Where Chinese calligraphy prizes structural balance and scholarly cultivation, shodo calligraphy integrates Zen concepts like ma (negative space) and the unrepeatable nature of each stroke. Every piece becomes a one-time performance, which is why Japanese calligraphy is often practiced as meditation rather than pure skill development.
These East Asian traditions also connect to other global brush traditions. Islamic calligraphy, for instance, developed its own sophisticated relationship between tool and spiritual expression, using reed pens and brushes to elevate Quranic text into visual art. Ottoman calligraphy refined these techniques further through elaborate scripts like Diwani and Thuluth, where flowing forms served both imperial documentation and architectural decoration. Across cultures, the pattern holds: the more responsive the tool, the deeper the tradition surrounding its mastery.
When to Graduate to Traditional Brush Tools
You're ready for a traditional pointed brush when brush pens start feeling limiting. Specifically, when you want more variation than the tip can deliver, when you're drawn to East Asian scripts or historical Western styles, or when you want to explore calligraphy as a contemplative practice rather than a purely decorative skill.
The practical requirements are real, though. Traditional brushes need ink preparation, whether that means grinding an ink stick on a stone or decanting bottled sumi ink. They need absorbent paper, typically rice paper or practice newsprint, that behaves nothing like the smooth cardstock brush pens prefer. And they need dedicated workspace since the setup isn't grab-and-go.
Pros
- Unmatched expressive range from hairline to broad strokes in a single tool
- Deep cultural and historical traditions providing structured learning paths
- Works with traditional inks that produce rich, archival-quality marks
- Develops whole-arm control and body awareness that elevates all other calligraphy work
- Connects your practice to centuries of calligraphy art across multiple civilizations
Cons
- Highest learning curve of any calligraphy tool category
- Requires ink preparation, specialized paper, and cleanup time
- Less portable than brush pens or hard pen tools
- Mistakes are immediate and unforgiving on absorbent paper
- Quality brushes represent a higher upfront investment
Traditional brushes represent the ceiling of expressive possibility. But not everyone needs to reach that ceiling alone. For learners who want to explore both hard pen precision and brush fluidity without committing fully to one path, bundled calligraphy sets offer a practical way to sample the full spectrum of tools in a single purchase.
Complete Calligraphy Sets for Exploring Both Styles
Buying tools one at a time makes sense when you already know what you want. But what if you're still deciding between hard pen precision and brush fluidity? A well-assembled calligraphy set lets you test both approaches without over-committing to either, and it often costs less than sourcing each item separately.
What a Complete Calligraphy Set Should Include
Not all bundled kits are created equal. Some lean heavily toward brush tools and leave hard pen learners with nothing useful. Others pack in dozens of colored markers but skip the fundamentals like practice paper and guidelines. A genuinely useful calligraphy set for exploring both styles should include these core components:
- At least one monoline pen or felt-tip marker for faux calligraphy and letterform practice
- A hard nylon tip brush pen (like the Tombow Fudenosuke hard tip) for controlled pressure introduction
- A soft brush pen for full thick-thin expression
- Smooth practice paper that won't fray brush tips or cause ink bleeding
- Calligraphy exercise sheets or guidelines with printed baselines, x-heights, and slant angles
- Calligraphy ink or refills appropriate for the included tools
Some kits also include an instructional booklet or access to online tutorials. These add value for self-directed learners, but the physical calligraphy supplies matter more than packaging. A set missing smooth paper, for example, will frustrate brush pen practice regardless of how many pens it includes.
According to calligrapher Carla Schall, a basic beginner kit costs between $20 and $50 and should cover essentials like pens, nibs, ink, and paper. Pre-assembled options like the Arteza Beginner Hand Lettering Set or The Postman's Knock Basic Bundle provide a curated starting point, while learners who want more control can assemble their own kit by choosing a style focus first, buying core items, and adding accessories as their preferences develop.
Cost Comparison of Starting Hard Pen vs Brush vs Both
One of the most common questions beginners ask is how much they need to spend before they can start practicing. The answer varies significantly depending on which path you choose. Here's how the calligraphy numbers break down:
| Setup Type | Tools Needed | Approximate Budget |
|---|---|---|
| Hard Pen Only | Felt-tip pens or gel pens, smooth paper (HP Premium 32lb or Rhodia pad), printed practice sheets | $10 - $25 |
| Brush Pen Only | Soft brush pen (e.g., Tombow Dual), hard tip brush pen, smooth marker paper, calligraphy ink refills | $20 - $40 |
| Combined Set | Monoline pen, hard tip brush pen, soft brush pen, practice paper pad, guideline sheets, instructional booklet | $30 - $60 |
The hard pen path is the cheapest entry point because you likely already own a qualifying tool. A gel pen and a stack of printer paper technically gets you started for free. Brush pens require a slightly higher investment since tip quality directly affects your learning experience, and cheap brush pens with inconsistent flex create bad habits. The combined approach costs more upfront but eliminates the need to repurchase later when curiosity pulls you toward the other style.
Keep in mind that calligraphy ink and paper are ongoing costs regardless of which path you choose. Brush pens consume ink faster than hard pens, and they demand smoother, higher-quality paper to protect their tips. Budget an additional $10 to $20 every few months for consumable calligraphy supplies once you're practicing regularly.
Who Benefits Most from Bundled Kits
Bundled calligraphy sets make the most sense for three types of learners. First, complete beginners who haven't yet decided whether hard pen or brush calligraphy suits their goals. Sampling both in a single purchase prevents the common mistake of committing to one style, finding it frustrating, and assuming calligraphy isn't for them when the other approach might have clicked immediately.
Second, gift buyers. A calligraphy set makes a practical present because it removes the decision paralysis that stops many people from starting. Everything arrives together, ready to use, with no research required.
Third, learners following the progression path outlined in this article: monoline practice first, then firm brush tip, then soft brush. A combined kit provides all three stages in one box, which means you won't outgrow your tools within the first month and need to reorder.
If you already know you want to focus exclusively on one style, buying individual tools gives you better quality per dollar. A dedicated brush pen learner, for instance, is better served by two high-quality soft brush pens than a kit that spreads the budget across tools they won't use. But for exploration and breadth, a bundled set is the most efficient way to discover where your interest actually lands.
With tools selected and budget understood, the real question sharpens: how do these two approaches actually compare when you put them side by side across every dimension that matters to a working calligrapher?
Hard Pen vs Brush Calligraphy Compared Side by Side
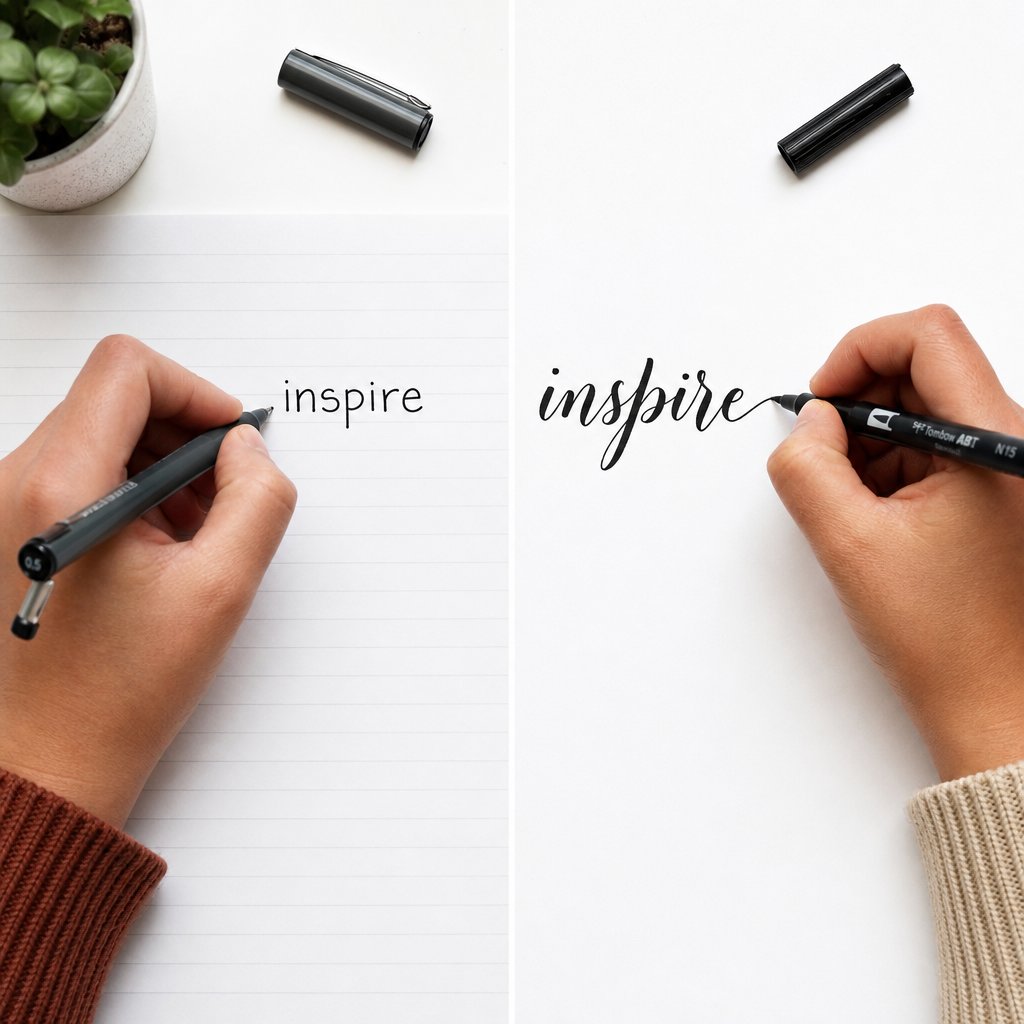
You've seen what each tool category offers individually. But when you place them next to each other across every practical dimension, the strengths and tradeoffs become much clearer. This side-by-side breakdown gives you a single reference point for deciding which calligraphy pen or calligraphy brush fits your situation, whether you're optimizing for speed of learning, project quality, or long-term versatility.
Feature-by-Feature Breakdown
Rather than relying on general impressions, here's how the two approaches stack up across the factors that matter most to working calligraphers and dedicated learners:
| Dimension | Hard Pen Calligraphy | Brush Calligraphy |
|---|---|---|
| Learning time to consistency | 1 - 3 weeks of daily practice for clean letterforms | 4 - 8 weeks of daily practice for reliable pressure control |
| Startup cost | $10 - $25 (often free with existing tools) | $20 - $50 depending on pen quality |
| Best for envelopes | Good with faux calligraphy technique | Excellent, natural thick-thin contrast looks professional |
| Best for invitations | Adequate for casual styles | Superior, the standard tool for wedding and formal work |
| Best for journaling | Excellent, works on any paper, fast and portable | Good, but requires smooth paper and more deliberate pacing |
| Best for signage | Strong for large-format and chalkboard work | Strong for medium-format decorative signs |
| Portability | High, any pen works anywhere on any surface | Moderate, needs smooth paper and careful storage to protect tips |
| Expressive range | Narrow, uniform stroke width without manual thickening | Wide, real-time thick-thin variation from a single tool |
| Muscle memory transfer value | High, letterform knowledge applies to every calligraphy style | Moderate, pressure skills transfer to pointed pen and traditional brush |
The pattern is clear: hard pens win on accessibility, speed of early results, and flexibility of use environment. Brush tools win on visual impact, expressive depth, and professional output quality. Neither dominates across every category, which is exactly why treating them as complementary rather than competing makes the most sense for long-term calligraphy writing development.
Which Style Wins for Each Use Case
If your primary goal is everyday handwriting improvement, hard pen calligraphy is the obvious choice. You practice with the same type of tool you write with daily, and the skills transfer immediately to notes, lists, and correspondence. No special paper required, no tip maintenance, no pressure mechanics to manage while you're just trying to write legibly and beautifully.
If you're preparing for a specific decorative project, like addressing wedding envelopes or creating holiday cards, brush calligraphy delivers results that look polished without post-processing. The thick-thin contrast reads as intentional and elegant, which is harder to achieve with faux calligraphy's manual thickening approach, especially at scale when you're lettering dozens of envelopes.
For artistic exploration and cultural depth, traditional brush tools open doors that neither hard pens nor brush pens can. Chinese, Japanese, and other East Asian calligraphy traditions require pointed brushes, and the expressive range of these tools supports creative work that modern markers simply can't replicate.
The Skill Transfer Path Between Styles
Here's what the comparison table doesn't fully capture: these two approaches aren't parallel tracks. They're sequential stages in a single progression. The Calligrascape calligraphy roadmap illustrates this clearly, placing lettering and handwriting (hard pen territory) on the left as the least difficult starting point, with brush calligraphy and pointed pen work positioned further right as skills that build on that foundation.
The progression works like this:
- Monoline hard pen — learn letterforms, spacing, slant, and stroke order without pressure complexity
- Faux calligraphy — train your eye to identify downstrokes and upstrokes, building awareness of where thick-thin belongs
- Hard nylon tip brush pen — introduce real-time pressure response in a controlled, forgiving range
- Soft brush pen — apply full pressure variation with confidence because you already know the letterforms and stroke logic
- Traditional pointed brush — explore maximum expressive range with whole-arm control and traditional ink
Each stage builds muscle memory that makes the next stage easier. A learner who jumps directly to soft brush pens without monoline practice spends weeks fighting both letterform confusion and pressure control simultaneously. A learner who follows the progression separates those challenges, solving them one at a time. That's why hard pen calligraphy builds skill faster in the early stages: it isolates the most fundamental variable, letter shape, and lets you master it before adding complexity.
The calligraphy brush isn't harder because it's a worse tool. It's harder because it asks you to manage more variables at once. Sequencing your learning so each variable gets individual attention is what turns a frustrating hobby into a rewarding, compounding skill.
Which Calligraphy Style Should You Start With
The comparison data points in one direction: your starting tool should match your immediate goal, not your ultimate ambition. A learner who wants beautiful wedding envelopes next month needs a different entry point than someone building a lifelong calligraphy practice. Here's exactly where to begin based on what you're trying to accomplish.
Start Here If You Want Everyday Handwriting Improvement
If your goal is better daily handwriting, legible notes, attractive journaling, and correspondence that feels personal, hard pen calligraphy is your path. You'll practice with the same type of tool you already use for writing, which means every skill transfers immediately to real life. No special paper, no tip maintenance, no pressure mechanics standing between you and visible improvement.
Calligraphy for beginners in this scenario looks like structured monoline practice: working through letterforms with a felt-tip pen or gel pen, focusing on consistent slant, even spacing, and deliberate stroke order. Within two to three weeks of daily 20-minute sessions, most learners see noticeable changes in their everyday writing. That fast feedback loop keeps motivation high and builds the foundational awareness that supports every other calligraphy style later.
Start Here If You Want Decorative Project Results Fast
When you have a specific event or project driving your timeline, a soft brush pen gets you to polished results faster than any other tool. Wedding envelopes, holiday cards, place settings, and gift tags all benefit from the natural thick-thin contrast that brush pens produce in a single pass. You skip the extra steps of faux calligraphy and go straight to elegant output.
The learning curve is steeper, yes. But if you're motivated by a deadline and willing to dedicate focused practice time, you can learn calligraphy with a brush pen well enough for project-quality results in four to six weeks. Pairing self-practice with structured instruction accelerates this timeline significantly. Local calligraphy classes or online workshops provide real-time feedback that solo practice can't replicate, helping you correct pressure habits before they become ingrained.
Here are the recommended starting points ranked by scenario:
- Wedding or event projects with a deadline — start with a soft brush pen (Tombow Dual Brush or Pentel Sign Touch) and practice basic strokes daily for four weeks before lettering final pieces
- Holiday cards and seasonal gifts — start with a hard nylon tip pen for controlled, forgiving results that still show thick-thin variation
- Social media content and journaling — start with a monoline pen for speed and consistency, adding brush pen accents as confidence grows
- Handwriting improvement — start with any hard pen and structured practice sheets focused on letterform consistency
- Artistic and cultural exploration — start with a traditional pointed brush and commit to a longer learning timeline with formal instruction
The Long-Term Mastery Path from Hard Pen to Brush
If your goal isn't a single project but a lasting skill, the progression path outlined throughout this article gives you the clearest route. Start with hard pen practice to isolate letterform learning. Move to a firm nylon tip to introduce pressure mechanics gradually. Graduate to soft brush pens once your pressure instincts feel natural. And if the art form pulls you deeper, explore traditional pointed brushes for their unmatched expressive range.
This sequenced approach works because each stage solves one problem at a time. You never fight letterform confusion and pressure control simultaneously. Calligraphy classes, whether local workshops or structured online courses, can accelerate any stage of this progression by providing expert feedback at the exact moment you're building new habits. But even without formal instruction, the path itself provides enough structure to keep your practice purposeful rather than random.
Hard pen and brush calligraphy are not competing styles. They are sequential stages in a single skill-building progression, where mastering one makes the other dramatically easier to learn.
The fastest way to learn calligraphy isn't choosing the most impressive tool. It's choosing the tool that matches your current skill level and immediate goal, then moving forward when that tool starts feeling easy. Hard pen builds the foundation. Brush pen builds the expression. Together, they build a calligrapher.
Frequently Asked Questions About Hard Pen vs Brush Calligraphy
1. What is the difference between hard pen calligraphy and brush calligraphy?
Hard pen calligraphy uses rigid-tipped tools like fountain pens, ballpoints, or felt-tip markers that produce uniform stroke width regardless of pressure. Brush calligraphy uses flexible-tipped tools that respond to pressure changes, creating thick downstrokes when you press hard and thin upstrokes when you lift gently. The core distinction is mechanical: hard pens demand consistent pressure for even lines, while brush pens require deliberate pressure variation to achieve the signature thick-thin contrast that defines brush lettering.
2. Is hard pen or brush calligraphy easier for beginners?
Hard pen calligraphy is significantly easier for beginners because it removes pressure control from the learning equation entirely. With a monoline pen, you focus solely on letterforms, spacing, and slant without worrying about how much force you apply. Most beginners achieve consistent results within one to three weeks of daily practice with hard pens, compared to four to eight weeks for reliable pressure control with brush pens. Starting with hard pen techniques like faux calligraphy also builds muscle memory that transfers directly to brush work later.
3. Can you do calligraphy with a regular pen?
Yes, any round-tipped writing instrument qualifies for hard pen calligraphy practice. Gel pens, ballpoints, felt-tip markers, and even pencils all work. You can use the faux calligraphy technique, where you write in a script style with your regular pen, then manually add thickness to downstrokes by drawing parallel lines and filling them in. This approach produces results that mimic brush calligraphy without requiring specialized tools, making it a zero-cost entry point for learning letterforms and stroke awareness.
4. How long does it take to learn brush calligraphy?
With focused daily practice of 20 to 30 minutes, most learners achieve project-quality brush calligraphy results in four to six weeks. The timeline depends on whether you build foundational skills first. Learners who start with monoline hard pen practice before transitioning to brush pens often progress faster because they already understand letterforms and stroke order. Pairing self-practice with structured calligraphy classes or online workshops can accelerate the timeline by providing real-time feedback on pressure habits.
5. Should I learn hard pen calligraphy before brush calligraphy?
Learning hard pen calligraphy first is the recommended progression for long-term skill development. Hard pen practice isolates letterform learning so you master shapes, spacing, and stroke order without the added complexity of pressure control. Once those fundamentals feel natural, transitioning to a firm nylon tip brush pen introduces pressure mechanics gradually. This sequenced approach prevents the common frustration of fighting both letterform confusion and pressure control simultaneously, making each subsequent tool easier to master.